

Today, I'd like to share a tutorial that guides you through sewing a flawless neckline when sewing with knit fabrics.
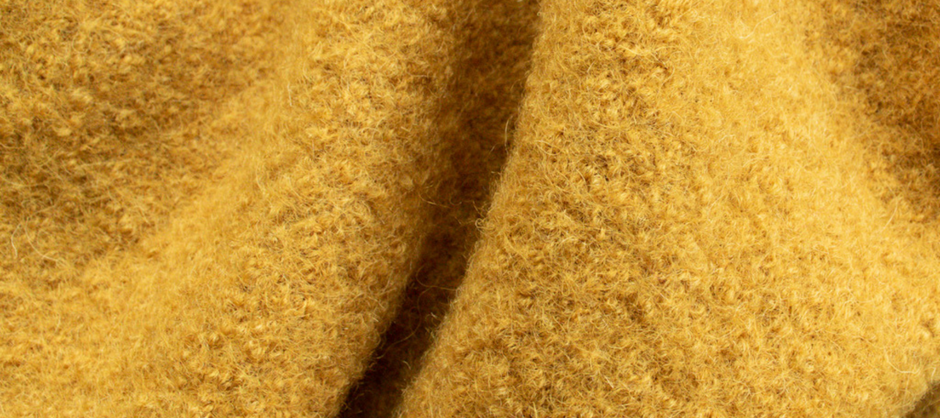
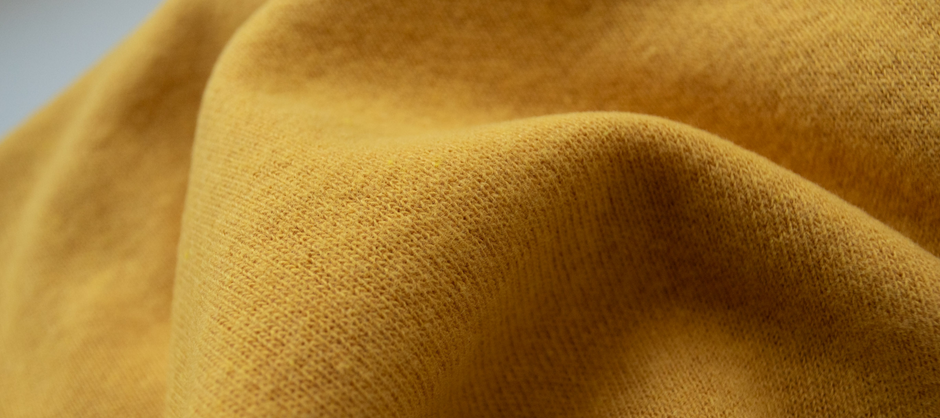
Our star fabric here, the chunky cotton knit fabric, is not only a dream to work with but also incredibly versatile. In this project, I'll also show you a fun way to utilise both sides of the fabric.
I used the tried-and-true Nova Knit Raglan pattern by Sinclair Patterns for this jumper. Thanks to its many options, this pattern has become a staple in my me-made wardrobe. (We do not stock this pattern, but can certainly print the A0 pattern for you here if you don't enjoy taping A4s together.)
You can customise your jumper with different sleeve lengths, body lengths, necklines, and more. This is very handy for someone with a long upper body like me.
Now, let's talk about how you can sew the perfect neckline using our chunky cotton knit fabric, one that lies flat.
This is achieved by stretching the neckband as you sew it onto the neckline and getting the amount of stretch just right, now that's the tricky part.
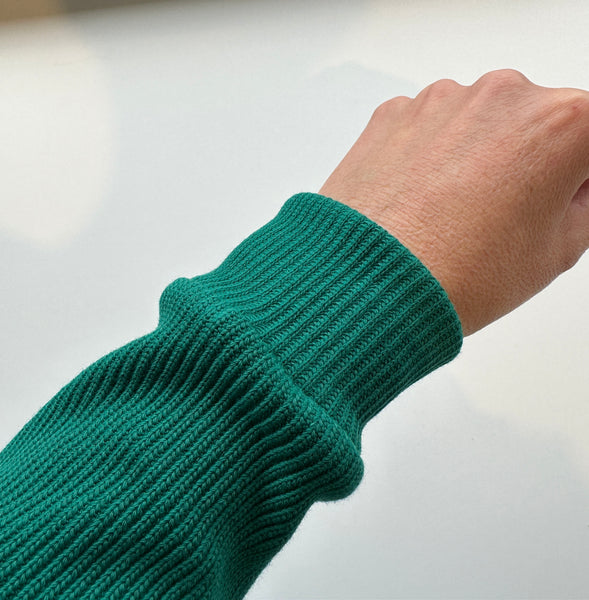
Customers have often inquired about matching ribbing for these fabrics. While this is not available, you can make the cuffs, neckline and waistband using the fabric itself, as it has enough stretch.
It's the same principle as if you were sewing a t-shirt in a cotton jersey. You can use ribbing for the neckline, but the cotton jersey can also be used. It's just a matter of what look you're after (the jersey does need to have sufficient stretch).
There are two primary methods for attaching neckbands, and I'll explain both before revealing why I chose the method I used for this project:
1. Open Shoulder Seam Method (Great for Beginners): This method is ideal if you're new to sewing neckbands or working with stretch fabrics. Here's how it works:
- You leave one shoulder seam open and close all the others.
- You sew on a neckpiece that's simply longer than needed; therefore, stretch calculations are unnecessary.
- As you sew it on, you evenly stretch the neckband along the neckline.
- This method is forgiving when unsure how long your neckpiece should be. I often don't use the pattern pieces of neckbands as they assume the stretch percentage of your fabric, which can vary greatly.
- It's also faster.
2. Closed Shoulder Seam Method (Professional Finish): For those seeking a neater, more professional finish on the inside of their garment, the closed shoulder seam method is the way to go. Here's what you need to know:
- In this approach, you first sew all shoulder seams of your garment.
- You create the neckband piece, sew the short seams, and create a circle.
- Add markings (I use notches or pins) at set intervals on the neckline and neckband (usually quartered) and match the markings to get the neckband to stretch evenly across the neckline.
- Then, you circularly attach the neckband, stretching it as you go.
- While this method offers a cleaner finish on the inside, it may require more precision and experience as the length of the circular neckband piece must be correct for your fabric.
For this particular project, I opted for the open-shoulder seam method. Why? It's the easiest and most forgiving method, especially since it was my first time working with this type of stretch fabric. This way, I achieved a lovely neckline that sits flat.
So here's how I did this for this raglan jumper step by step:
-
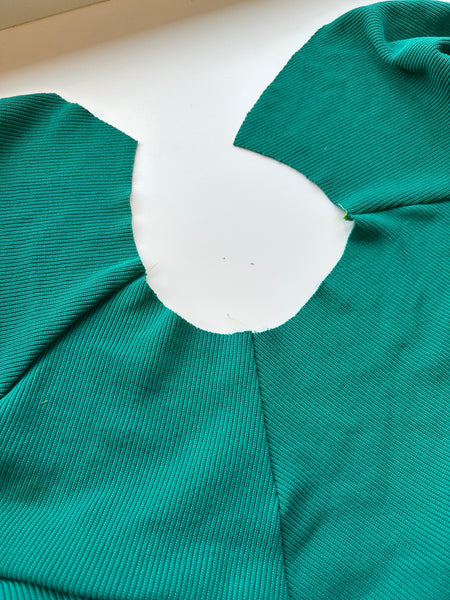
Start by sewing three of the shoulder seams of your raglan jumper, leaving one open. This open shoulder seam will allow you to attach the neckline more easily.
-
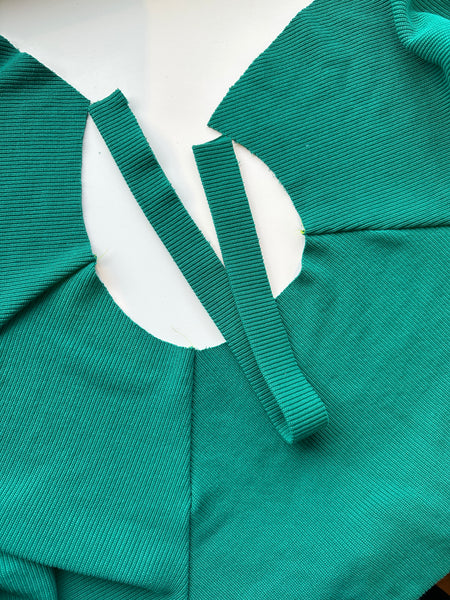
Cut a strip of fabric for the neckline, ensuring it's long enough. Fold it in half and press.
-
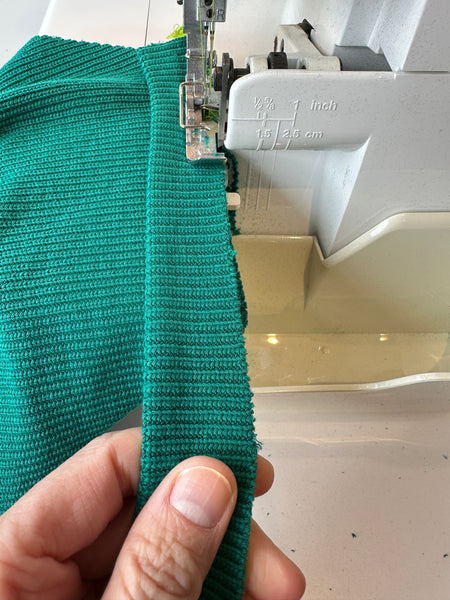
Sew the neckline strip onto your jumper using an overlocker or a regular sewing machine. If you're new to this technique, consider basting the neckline first to test how much you need to stretch the piece as you sew it.
-
Gently and evenly pull the neckline piece as you sew it onto the neckline without stretching the neckline. Stretching this neckline piece is the key to getting it to lie flat.
-
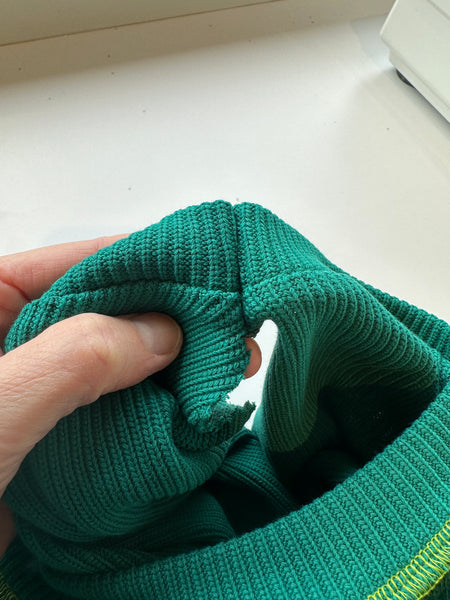
Trim any excess fabric, then line up the remaining shoulder seam.
-
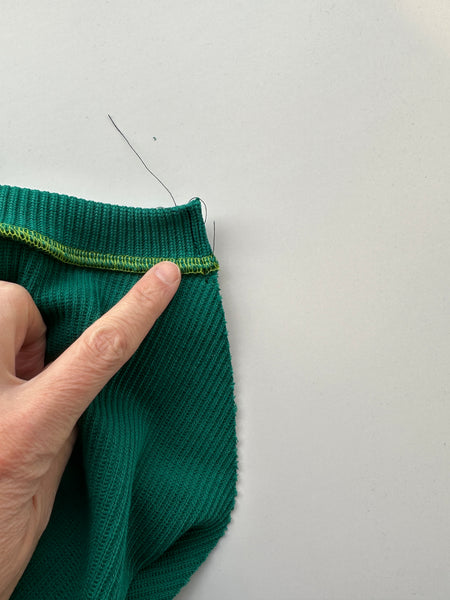
Baste the top part of the shoulder seam using your sewing machine to ensure all seams are nicely aligned. Overlock the seam once you're satisfied with the alignment.
-
use a needle with a big eye to pull the thread into the stitched loops for a neat finish.

As a final, fun finishing touch to my chunky cotton knit jumper, I added a sewing label to the bottom of the waistband. This little detail adds a touch of personality to the garment. We have lots to choose from on our website, you can find them here.
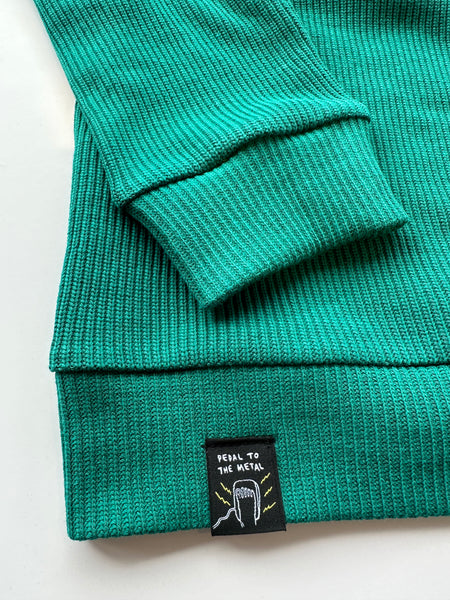
You can also see how I used the "wrong side" out for the cuffs and waistband for a bit of contrast.
The creative possibilities are endless with our expanding range of colours in the chunky cotton knit collection. I'm already planning a cropped version!