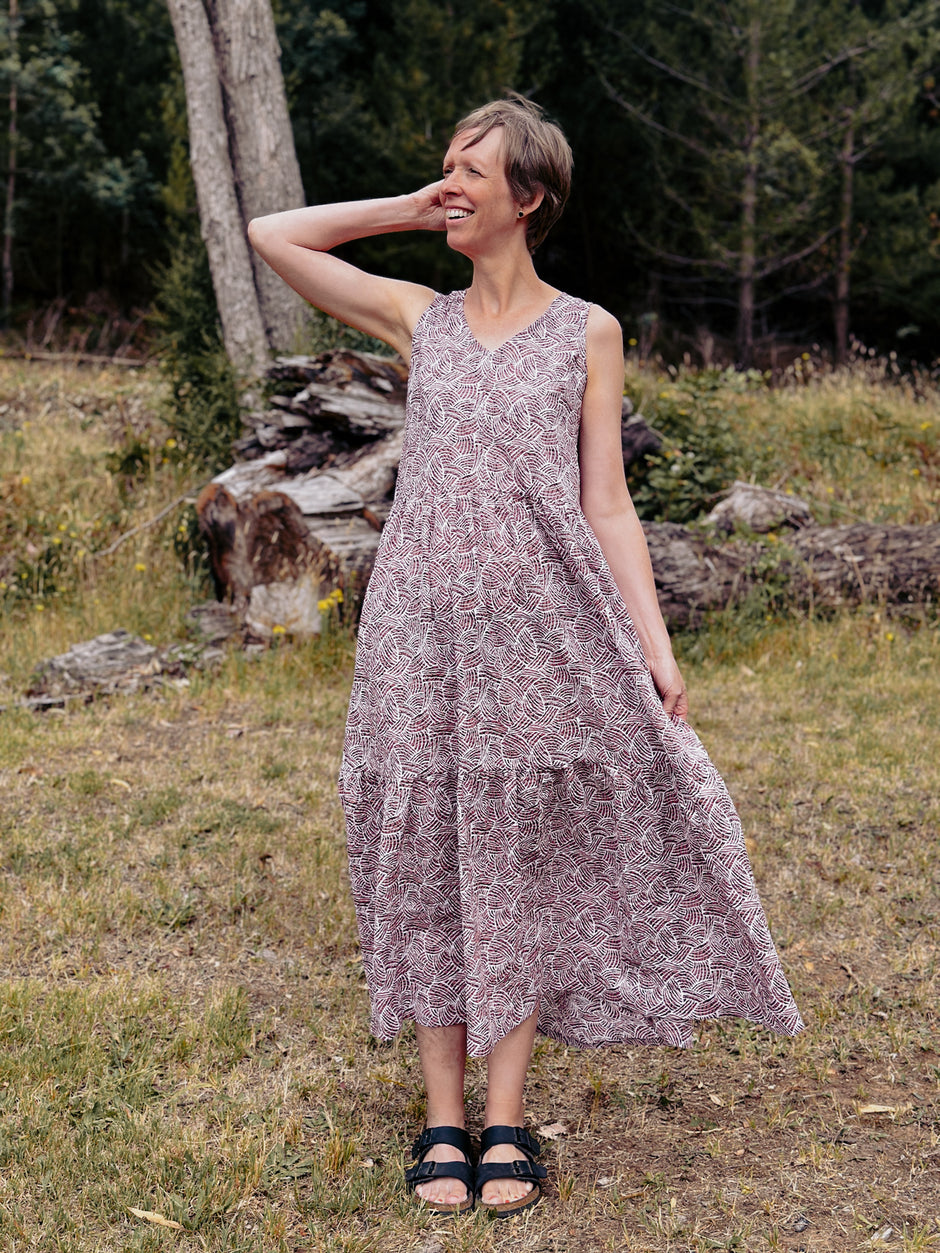
Last summer, I attended a party where a friend wore a stunning dress from Australian fashion label Mister Zimi.
The dress had a shirred sleeveless bodice with a flowing tiered skirt, and I loved it so much that I decided to try making one myself.
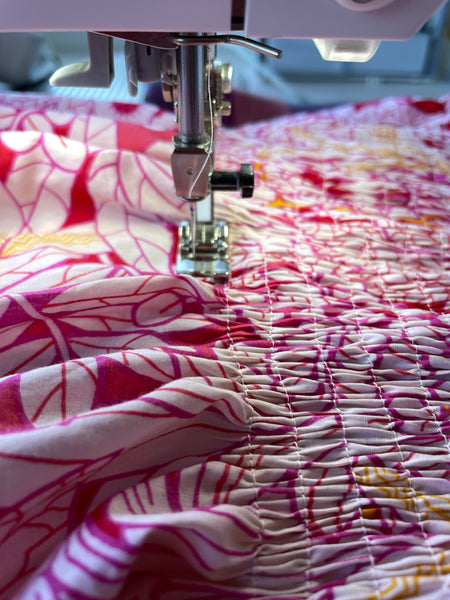
Despite having never attempted shirring before, I watched a few YouTube tutorials and dove in.
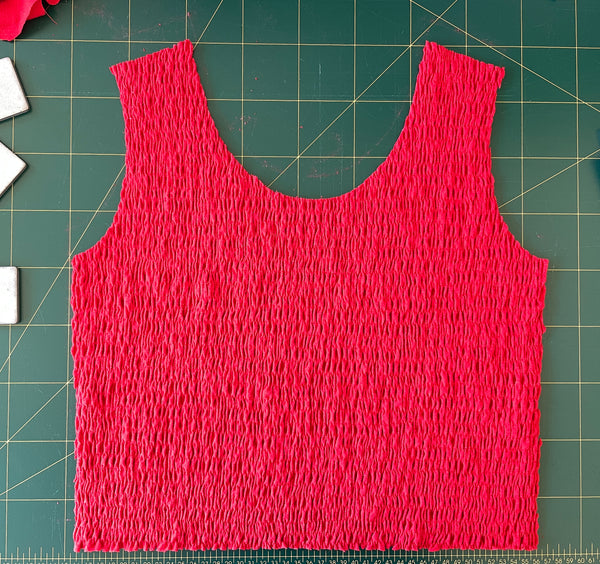
For the bodice, I basically created shirred fabric first and then put my pattern pieces on top of that to cut them out.
I chose a red viscose linen noil fabric, which I soon realised was not the best colour for me, but I had a great time shirring nonetheless. So I decided to make another one in a fabric that suited me much better.
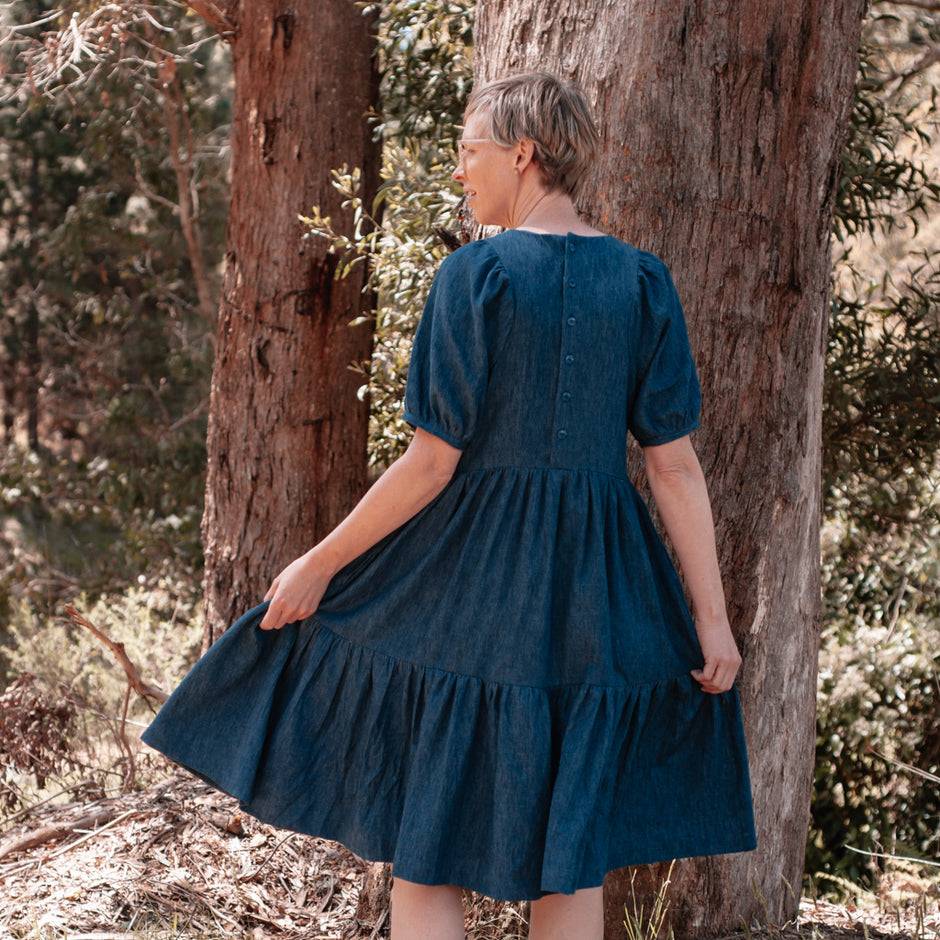
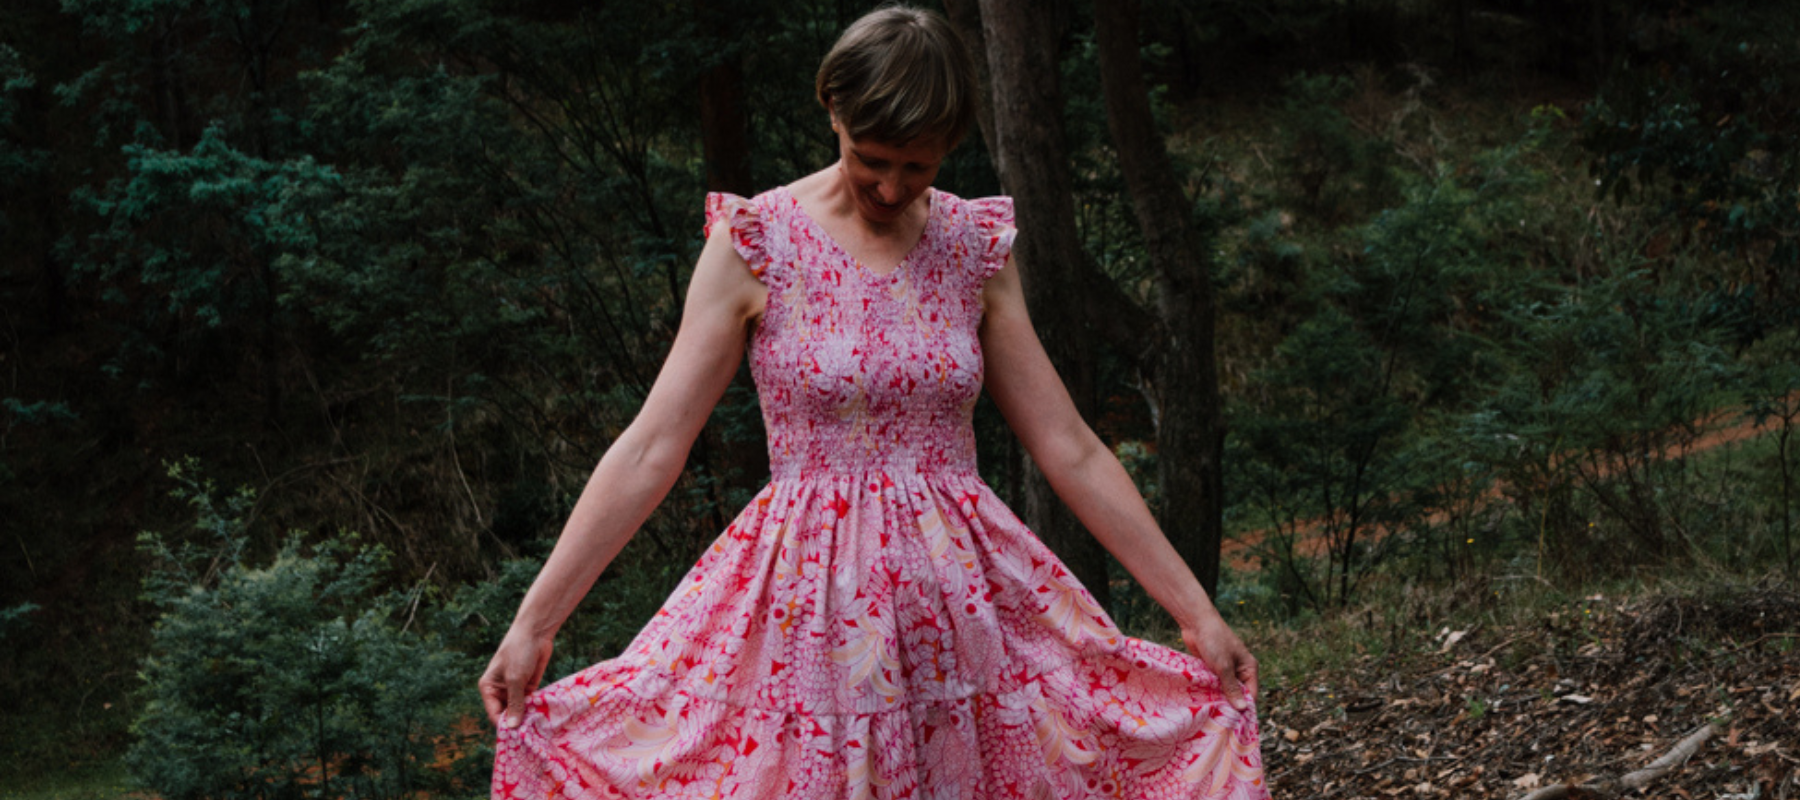
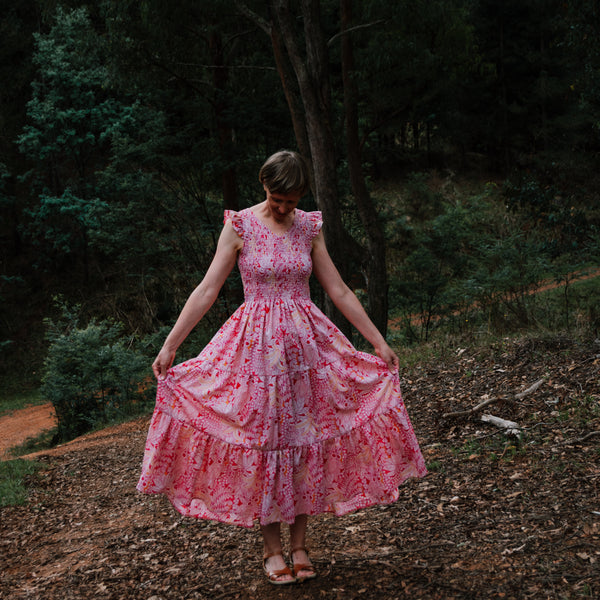
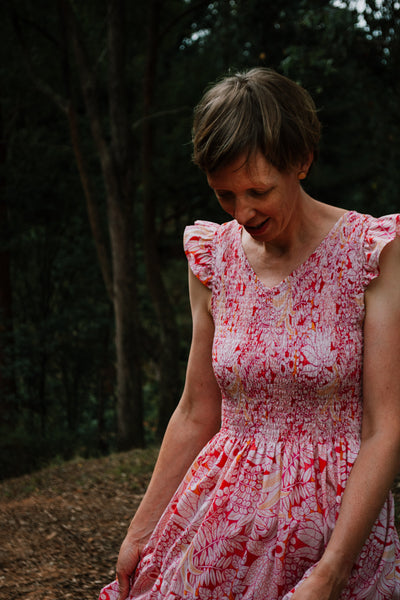
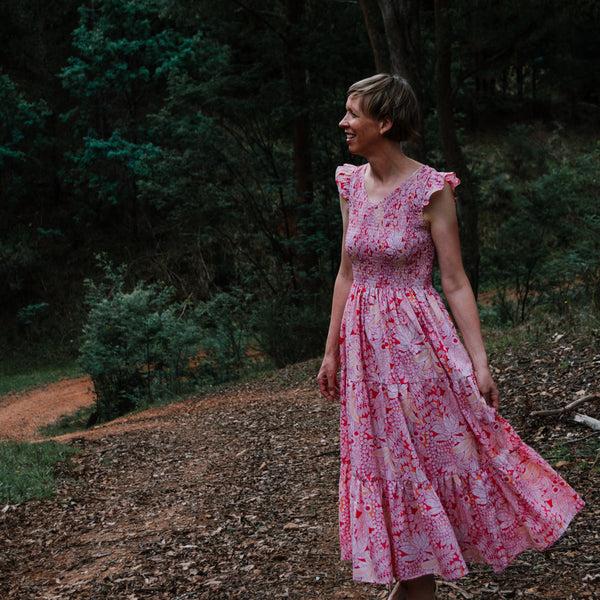
Using my experience and knowledge from the red dress, I made a second dress, using Cotton Lawn from Storrs London.
I found the shirring process strangely satisfying even though it's very repetitive.
I learned several valuable lessons during the process:
1) Shirring gathers fabric more than you might expect
I thought I could just shirr one full width of the fabric, and that would be enough for a front and back bodice piece, but unfortunately, it was just short by a few cm!
So I had to do it twice. I ended up needing just over 100cm of fabric width for each.
2) Prepare your bobbins with the elastic thread beforehand.
For shirring, you need to wind shirring elastic onto the bobbin by hand. So I prepared several bobbins before I started sewing to save time, which was great as I needed to change bobbins a lot, about every 4 to 5 rows.
I used two full rolls of shirring elastic to create both bodice pieces. And I used 3 bobbins of regular thread from memory to sew this dress, so it eats quite a lot of thread.
3) Decide how much distance you want between each stitched row.
At first, I was just lining up the side of my presser foot along the previous stitch line but that made the lines too close to each other (about 6~7mm), it looked great but this was just going to take way too long.
So instead I moved my needle outwards as much as possible and created bigger gaps between each line, about 1cm.
I used a stitch length of 5 and increased the thread tension a bit, from the standard 5 to 6.
4) Stitch in both directions.
I turned the piece after sewing each row, I found if you work in one direction only, the shirring was starting to look a bit skewed.
When I got shirring I just went fast, so I didn't worry too much about going perfectly parallel to the previous line. I find it doesn't really matter as the shirred look is kind of irregular anyway.
In the end, I got the whole piece shirred in about an hour.
When I made the red dress, I made the bodice first and then attached the skirt to the bodice. This meant I needed to gather the top tier before sewing it onto the bodice.
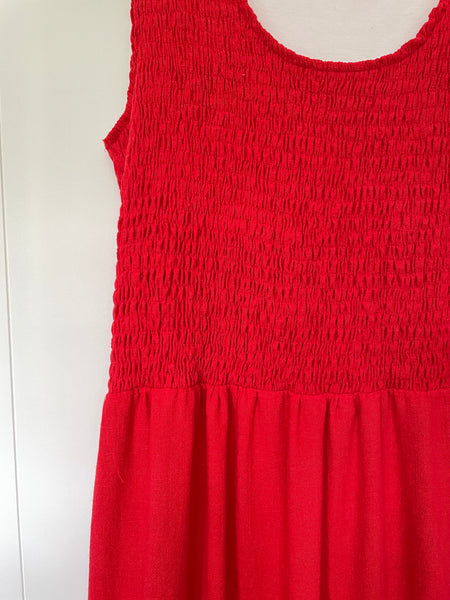
For the Storrs London dress however, I figured I could just cut the bodice pieces to include the top tier, as the shirring would already create the top tier gathering.
This saved gathering time but the disadvantage of doing this is that you need a lot more fabric if you're adding several tiers to the skirt.
I did so many calculations for that skirt. There are different calculators as to how much you increase the circumference of each tier to create those beautiful gathered layers.
You can just double each time, but in the case of the Storrs London Dress, this was just going to take an excessive amount of fabric.
The top tier ended up having a circumference of about 200cm already. So tier 2 was created using 2 full widths of the fabric so I got close to 300cm circumference there.
Then I used 3 heights of fabric for the bottom tier. So overall I used a ratio of about 1.5 from tier to tier.
The red dress got one outing, on Christmas Day!! And that might be the only time.
I think that dress will be upcycled into a skirt I'll donate to a friend who looks great in red.
I also didn't love the neckline so I went for a V-neck for the 2nd dress. I added two simple gathered sleeves.
If you're wondering how to create those, it's easy, here's a great tutorial on Youtube.
I used the Rio Ringer sewing pattern by True Bias for the bodice as I know this is a very snug-fitting T-shirt. I lowered the armscye and altered the neckline. I did make a few toiles here because I was so nervous cutting into the precious shirred fabric. (I still don't think I got it quite right, the shoulder part needs to be wider.)
I also stay-stitched the neckline and armhole areas after I cut the pattern pieces, even though the shirring stayed nicely in place after I cut it.
The Storrs London cotton lawn was a dream to work with. It feels silky smooth but is easy to cut and sew, not slippery at all.
So now I have a beautiful floaty dress. I'm not convinced about the sleeves though so I might still change though. (My T-shirt tan doesn't help there either!)